# Skinning
Since CGI 3.14, you can import skinning Filmbox (FBX) or GL Transmission Format (glTF) files. Scene Composer can then play the skinning animations. However, the following limitations exist:
- The maximum number of joints associated with each vertex is 4.
- If the number of joints associated with a SkinningMesh is 100 or less, Scene Composer performs skinning using a shader.
- If the number of joints associated with the SkinningMesh is between 101 and 255 (maximum), Scene Composer performs skinning processing on the CPU. In this case, the performance decreases.
- CGI Studio manages rotations using Euler angles, so reproducing the animation might not be possible.
- If a SkinningMesh and the SkinningMesh's parent Transform are not identity matrices and the SkinningMesh does not appear as expected, set the identity matrix for SkinningMesh and the SkinningMesh's parent Transform.
- If you place a SkinningMesh and Joint Nodes under a Group, CGI Studio applies the changes in the Group's Transform to the SkinningMesh twice.
In addition to the above, note the following limitations when importing skinning in FBX file format.
- CGI Studio does not support FBX format FbxSkin::eDualQuaternion and FbxSkin::eBlend.
- CGI Studio does not support FbxCluster::eAdditive in FBX format.
#### SkinningMesh
Note that you can create a SkinningMesh that you can use in Scene Composer by importing an FBX or glTF file that contains at least one skinned mesh. A SkinningMesh that you create by importing a file has the following properties:
When you import a glTF file with **Import Dynamic Appearance** enabled, Scene Composer attaches a GltfAppearance to the SkinningMesh. For the individual properties of GltfAppearance, see [**Properties Overview**](https://doc3161en.candera.eu/books/appendix/page/properties-overview).
##### Skin (Common Properties)
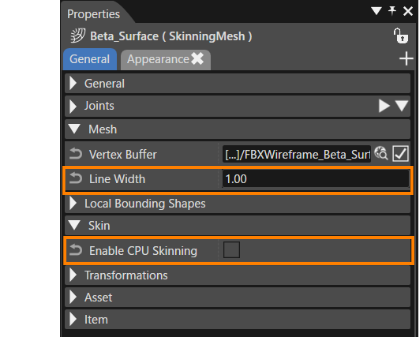
| Line Width | This property is only available if you enable the [**Import as wireframe**](https://doc3161en.candera.eu/books/import-of-resources/page/import-dialog-options#bkmrk--01) option when importing an FBX file that contains skinning. The Line Width property specifies the line width of the mesh when Scene Composer renders it as a wireframe.
- Scene Composer determines the actual line width by rounding the specified width to the nearest integer.
- If the setting is less than “1”, Scene Composer always sets it to “1”.
|
| Enable CPU Skinning | This property specifies whether you enable CPU Skinning. If you enable it, you can use vertex shaders other than those provided for skin with Skinning Mesh.
**Note**: It is recommended to avoid CPU skinning calculations because they are slow. If you enable CPU Skinning, edit or configure the shader in a way that skinning is not performed by the shader.
|
##### Other Property items
CGI Studio sets the following properties during import, that are not editable:
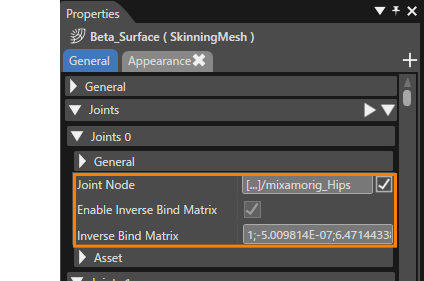
| Joint Node | This property ses a joint node. |
| Enable Inverse Bind Matrix | This property specifies whether Inverse Bind Matrix is enabled.
If the property is enabled, the joint uses the Inverse Bind Matrix.
If the property is disabled, the joint uses the identity matrix.
|
| Inverse Bind Matrix | The Inverse Bind Matrix brings coordinates that are being skinned into the same space as the joint. |
#### Adding Imported Scenes
Import of FBX or glTF files that include skinning by using the standard procedure ([FBX import procedure](https://doc3161en.candera.eu/link/1101#bkmrk-image%2C-font%2C-shader%2C-1), [glTF import procedure](https://doc3161en.candera.eu/link/1101#bkmrk-images%2C-fonts%2C-shade)). After importing, create new scenes and animations from the scenes and animations in the imported resources.
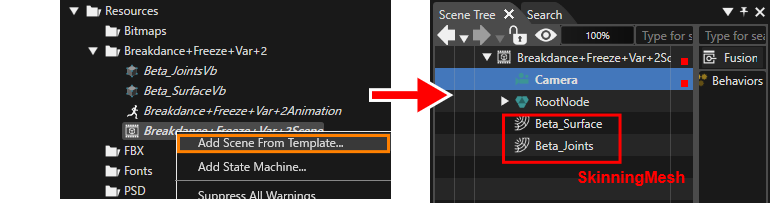
1. Select a scene contained in the imported resource and select **Add Scene From Template...** from the context menu.
- The **Add New Scene 3D** dialog appears.
- For more information on the **Add Scene From Template...** feature, see [Add Scene From Template](https://doc3161en.candera.eu/link/41#bkmrk-imported-scene).
2. Configure the necessary settings on the **Add New Scene 3D** dialog and click **OK**.
- Scene Composer adds the scene as a new scene in the **Solution Explorer panel**, in the **Solution > Scenes** folder.
- The **Scene Tree** panel displays the added scene.
CGI Studio adds the [SkinningMesh](#bkmrk-skinningmesh) to the imported scene (red frame in the right figure above).
If the imported scene does not contain any [camera](https://doc3161en.candera.eu/link/130#bkmrk-camera) or [light](https://doc3161en.candera.eu/link/130#bkmrk-light) nodes, add them to the new scene from the **Node 3D** item in the **Toolbox** panel and configure the required settings.
#### Add a Render Target
Add the camera of the imported scene to the render target.
##### When a camera node is added
1. Display the **Render Targets** panel.
- Scene Composer has already added a camera with the added scene name in the panel.
2. Select the checkboxes for the added cameras.
##### If the imported scene contains a camera
1. In the **Render Targets** panel, right click on the **Render Target** and select **Add Camera to Render Target...** from the context menu.
- The **Choose Item** dialog appears.
2. Expand the **Scenes** folder in the **Choose Item** dialog and select the cameras in the scene you added and click **OK**.
#### Add Imported Animations
To play the skinning animation in the Player, add the animation from the imported resource.
1. Right-click an animation contained in the imported resource and select **Add Animation From Template...** from the context menu.
- The **Add New Animations** dialog appears.
- For more information on the **Add Animation From Template...** feature, see [Create animation from template](https://doc3161en.candera.eu/books/animation-design/page/create-animation-from-template).
2. Configure the required settings in the **Add New Animations** dialog and click **OK**.
- You can see in the Solution Explorer, that Scene Composer created a new animation.
#### Play Skinning Animation
Use CGI Player to play back skinning animations in a composed scene.
1. Click **Play selected scenario...** on the toolbar to launch the CGI Player.
- If your solution contains unsaved changes, Scene Composer opens the **Save Solution** dialog asking you to save the solution. Click **OK** in the dialog to save the solution.
- Scene Composer generates the asset file and opens it in CGI Player.
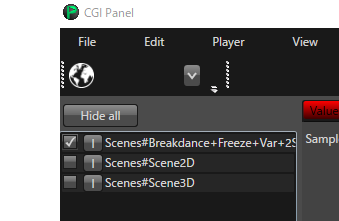
2. In the **CGI Panel**, check the target scene from the scene list on the left side.
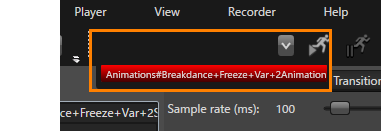
3. Use the pull-down menu to select the animation, that you want the CGI Player to play.
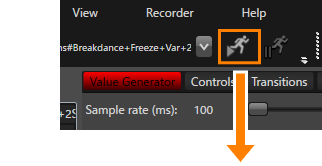
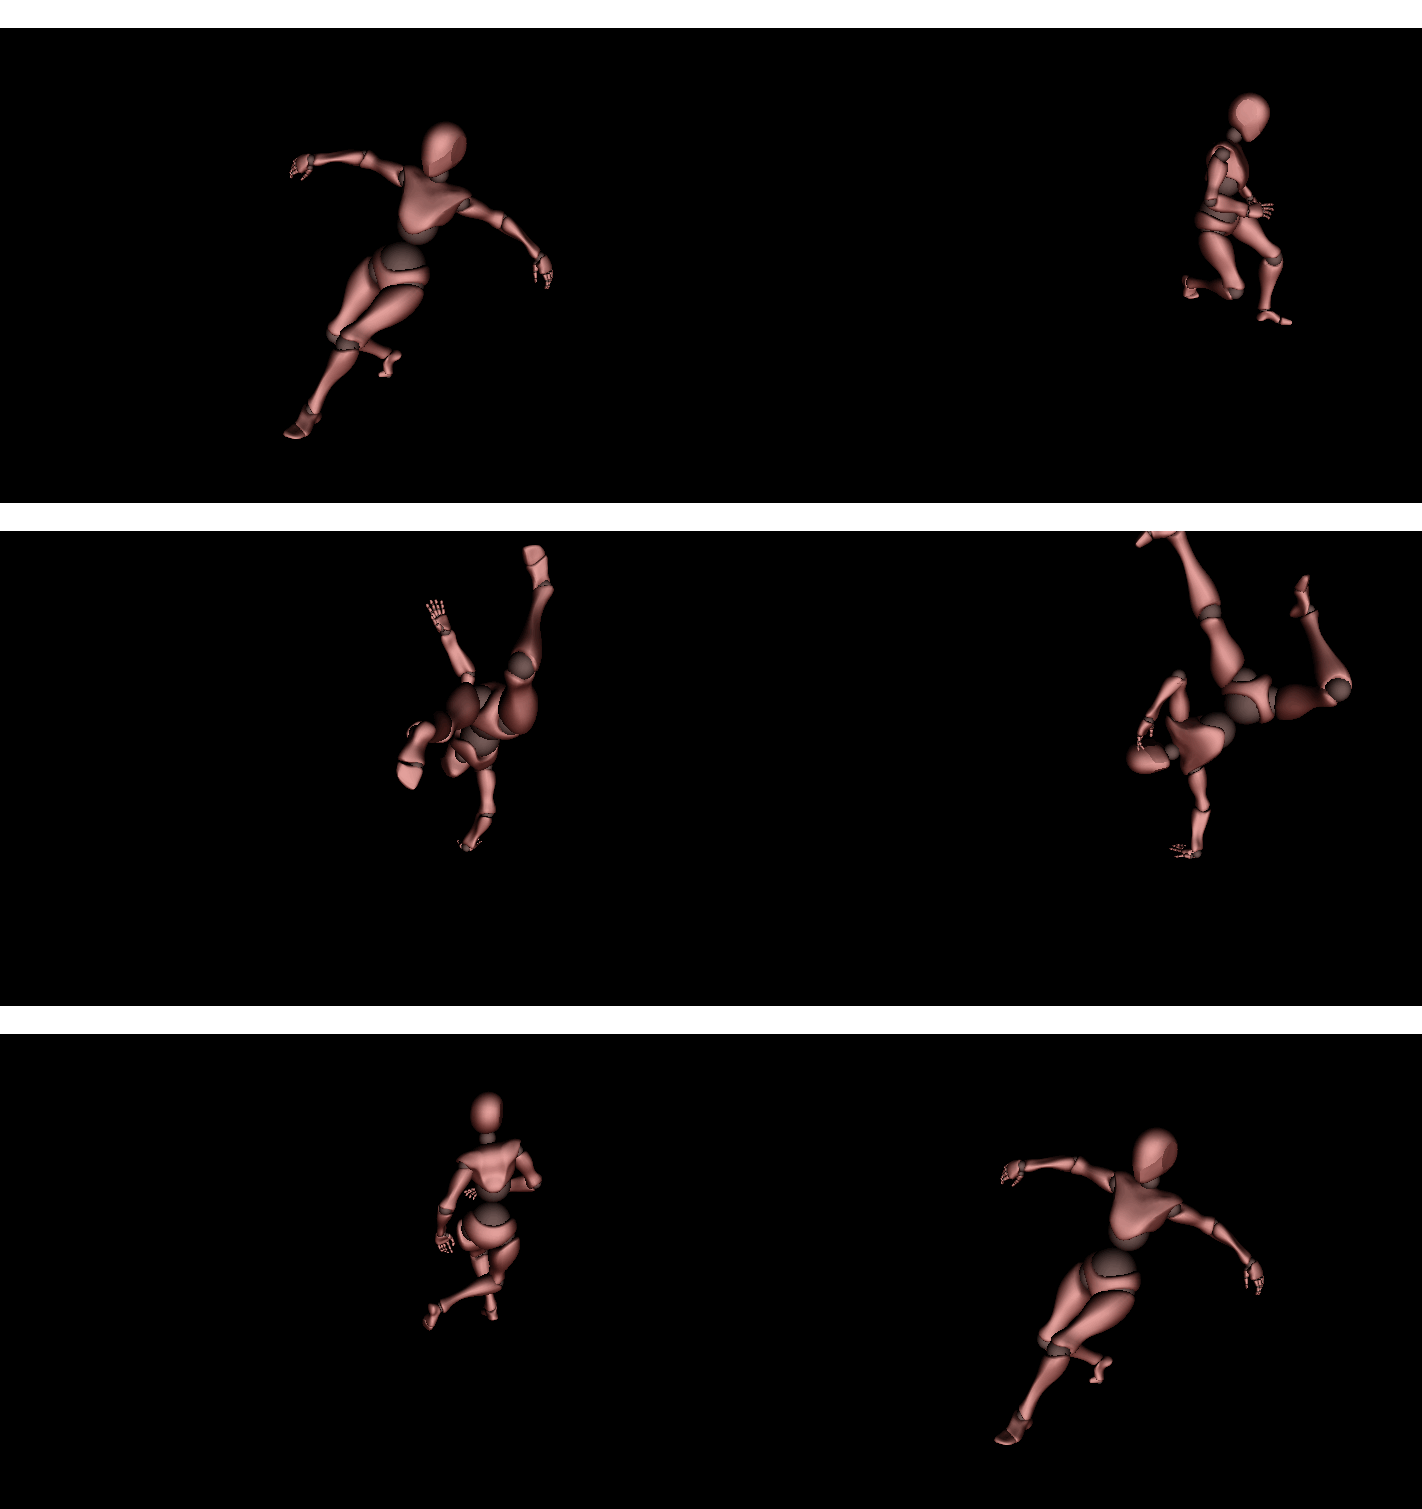
4. Click **Play Animation** in the toolbar to play the animation.
- CGI Player starts to play the skinning animation specified in the Panel.
[](https://doc3161en.candera.eu/uploads/images/gallery/2024-05/skinninganime.gif)