# Environment Options
# General Options
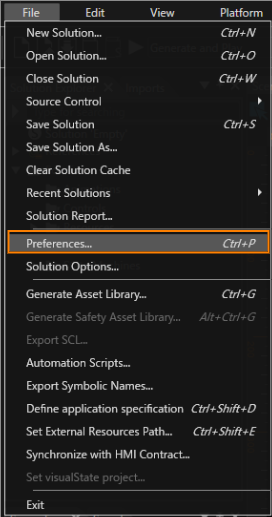
SceneComposer Customization can be done via menu bar \[ File > Preferences... \].
---
#### Hide warnings and messages from imports in Problems panel
If enabled, warnings and messages from imports in the Problem panel will be hidden.
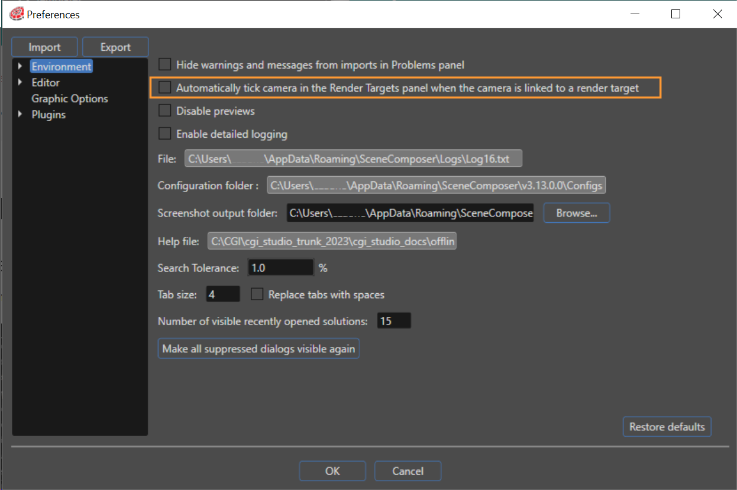
#### Automatically Tick Camera
If enabled, Camera rendering will be automatically enabled when a Camera is linked to a Render Target. Also, this setting only applies to Camera that are newly linked to Render Target, and does not affect the settings of Cameras that are already linked to Render Target.
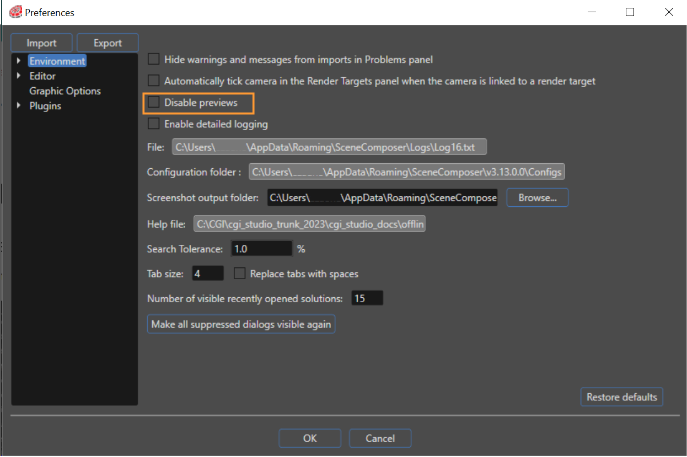
#### Disable Previews
If enabled, image file previews will be hidden, which may improve Scene Composer performance (e.g. when importing a large number of images).
#### Enable Detailed Logging
If enabled, more detailed Scene Composer log files will be output, which may be useful for debugging analysis and performance improvement.
#### File
This is the path to the detailed log file.
#### Configuration folder
This is the path to the folder where all Scene Composer configuration files are saved.
#### Screenshot Output Folder
This sets the output destination for taking Display screenshots.
The default output destination is C:\\Users\\...\\AppData\\Roaming\\SceneComposer\\Screenshots.
You can take a Display screenshot using the following steps.
1. Display the desired Display panel using one of the following methods.
- In the Render Target panel, double-click the desired Display.
- From the menu bar, click \[ View > Display \] and then click the desired Display.
2. Take a screenshot using one of the following methods.
- In the Render Target panel, click \[ Save Screenshot \] from the context menu of the desired Display.
- From the context menu of the desired Display panel, click \[ Save Screenshot \].
- With the desired Display panel active, press <F12>.
Once the screenshot is taken, the Screenshot output folder will open and you will see that the screenshot image has been saved in PNG file format.
#### Help file
This is the path to this document (CGI Studio Documentation).
#### Search Tolerance
The percent value given to the option "Search Tolerance" is taken in to account during the search operation for properties of type Float, Color when the operator "about equal" is used.
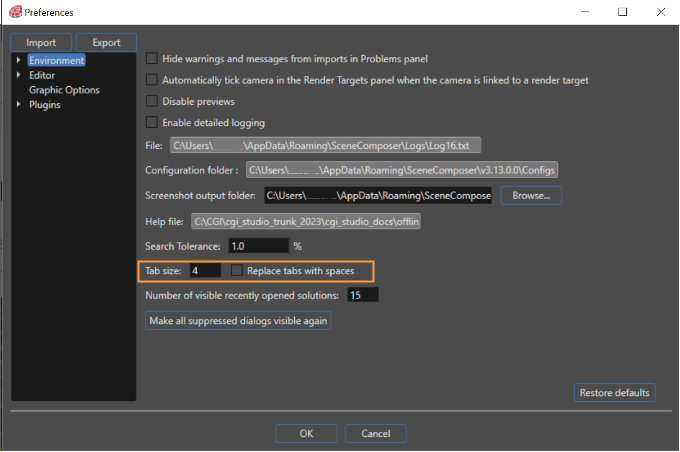
#### Tab size / Replace tabs with spaces
The user can change the tab size and decide if tabs should be changed to spaces. This option is available for editing shaders in the Shader Editor panel ("View" > "Editors" > "Shader Editor").
There are platforms which do not allow shaders editing operation.
#### Number of visible recently opened solutions
Sets the maximum number of recently opened solutions to be displayed in the Startup panel (maximum: 20).
#### Make All Suppressed Dialogs Visible Again
"Make all suppressed dialogs visible again" option enables the display of the dialog boxes asking confirmations for generate asset and import FBX files option. One can disable the option of displaying these dialog boxes by unchecking the "Always show this dialog" option.
---
# Easy Mode
#### Overview
Easy Mode provides a configurable interface for managing the properties of individual elements. It allows you to hide unused properties in the properties panel, helping streamline workflows when working with a large set of attributes. In addition, Easy Mode supports exporting and importing custom property-configuration files, enabling each user (such as designers or developers) to apply the configuration that best fits their role or workflow.
This feature was implemented in CGI Studio 3.12 and earlier as a function to generate Easy Mode configuration files using the "SceneComposerConfigurator.exe" file. From CGI Studio 3.13 onward, this has been updated to make it easier than ever to set Easy Mode from "Preferences" in Scene Composer.
#### Target Elements
The following element types support property customization in Easy Mode:
- Behavior
- Effect
- Node(Node 2D, Node 3D)
#### Customizable Items
The following property aspects can be configured in Easy Mode:.
- **Visibility** - Specify whether a property is shown or hidden in the properties panel.
- **Read-only** - Define whether a property can be edited by the user.
- **Initial Value** - Set the default value applied to the property when an element is created.
The set of customizable property options varies depending on the specific property.
#### Customizing properties
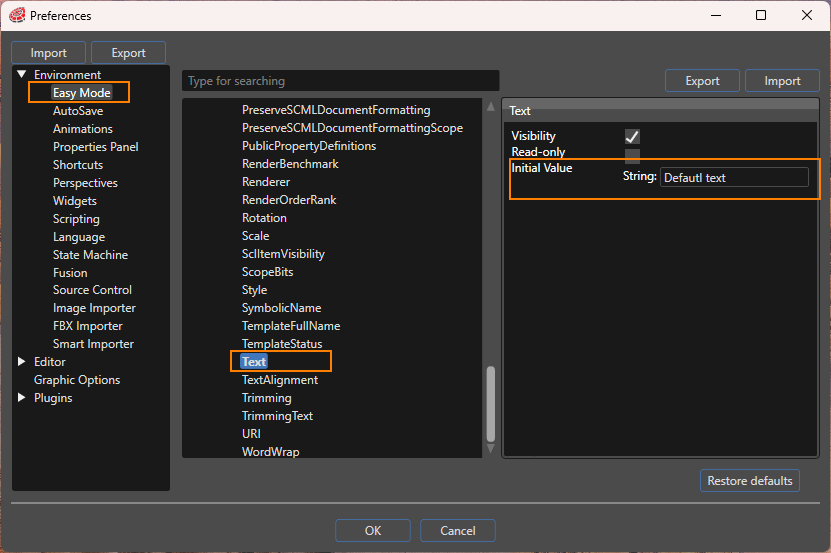
1. Open the Preferences dialog by selecting **File > Preferences...** from the menu bar.
2. In Preferences dialog, navigate to **Environment > Easy Mode**.
3. Choose any element and customize its properties by adjusting any of the following options:
- Visibility
- Read-only
- Initial Value
The image above shows how to set the initial value of TextNode2D's Text property to "Default text".
#### Export and Import
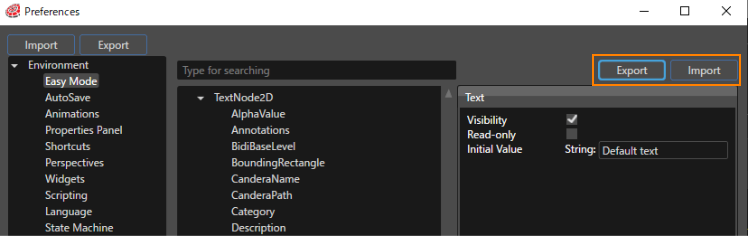
- **Export** The property configurations defined in the Preferences dialog can be exported as an XML file. To export the current Easy Mode settings, click the **Export** button located in the upper-right corner of the Preferences dialog (see image below).
- **Import** To import a previously exported XML configuration file click the **Import** button in the upper-right corner of the Preferences dialog.
#### Restore defaults
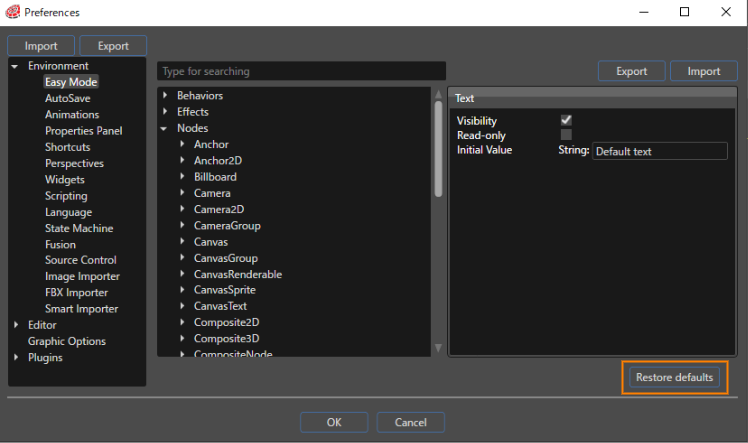
Clicking the **Restore defaults** button in the lower-right corner of the Preferences dialog resets all previously customized properties to their original default settings.
Clicking **Restore defaults** button will revert all property settings for all elements back to their default values.
Use this function with caution, as all customized configurations will be lost.
# Auto Save
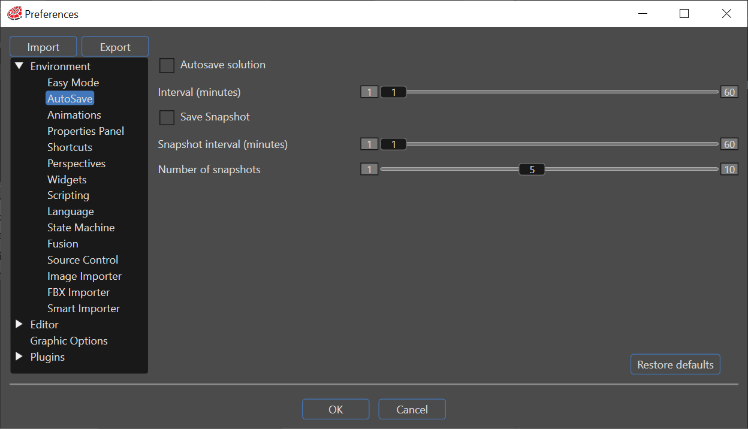
#### Autosave solution
Instead of manually saving an ongoing solution at different times, the user has the possibility to set the automatically process of saving the solution.
If the user enables this setting (Disabled by default), the SceneComposer automatically saves your document at certain intervals (30 seconds). If the user is highly concerned about losing data, the interval can be decreased. But if the user is distracted by the hard drive crunching too often, it is possible to increase the interval. Either way, changing this interval is easy by using the "Interval" cursor.
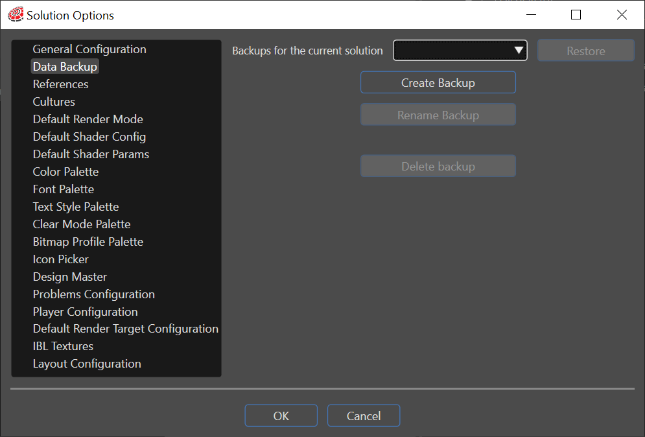
A backup can be created manually by using the "Create Backup" button. In the same way a backup can be renamed or deleted.
#### Save snapshot
Saving snapshots function is important for reducing the risk from unexpected outages. By automatically generating snapshots at set intervals, SceneComposer gives to the user the ability to restore the system to a previous valid state. A "Creating snapshot..." message is displayed in the title bar when the backup solution is made. The "Save snapshot" option lets the user to specify:
- Snapshot interval (minutes): By using the cursor the user can choose a value between 1 and 300 seconds. The default frequency is 30 seconds.
- Number of snapshots: Multiple snapshots can be saved. The default number of snapshots retained is five.
All the saved snapshots can be accesed via Solution Options panel. There, in the "Data Backup" section, the latest snapshots are available in the "Backups for the current solution" field. The user can select one of them in order to restore the solution to it.
Any restore point of the solution can be found on the hard disk as follows:
> ...\\AppData\\Local\\SceneComposer\\sol\\...
---
# Animation Options
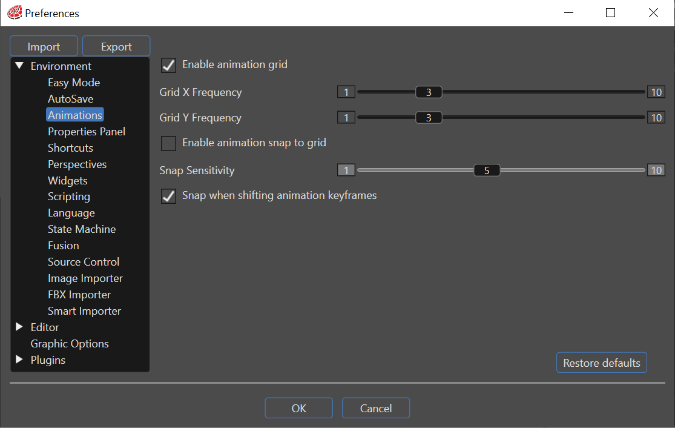
#### Enable animation grid
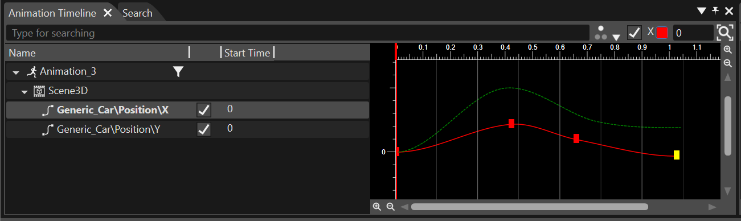
The animation grid represents a collection of lines at a configurable step size for each axis (Grid X Frequency and Grid Y Frequency) that is rendered in the background of the CurveEditor of the AnimationTimeline panel.
#### Grid X Frequency
If \[Enable animation grid\] is enabled, set the interval for displaying the animation grid along the X axis.
#### Grid Y Frequency
If \[Enable animation grid\] is enabled, set the interval for displaying the animation grid along the Y axis.
#### Enables animation snap to grid
The "Enables animation snap to grid" option enables the keyframes to become aligned to the grid when being translated in the Curve Editor of AnimationTimeline panel.
#### Snap Sensitivity
If \[Enables animation snap to grid\] is enabled, set the desired sensitivity (the range is the distance to guideline where the keyframes stick to the grid).
#### Snap when shifting animation keyframes
If enabled, animation keyframes can be set in units of 5 frames on the animation timeline. If disabled, they can be set in units of 1 frame.
---
# Properties Panel - Favorites
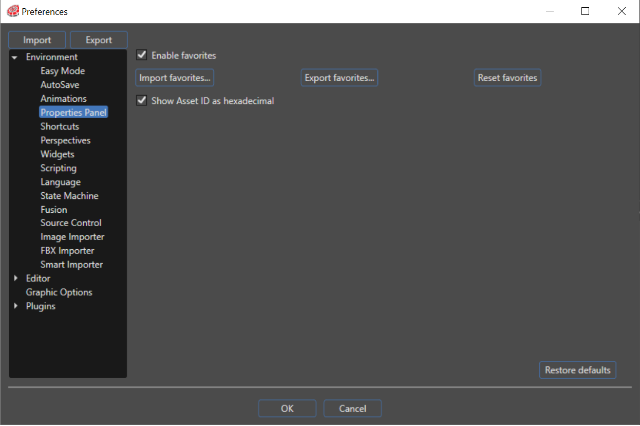
#### Enable favorites
You can save any property as a favorite property.
##### Add / Remove Properties to Favorites
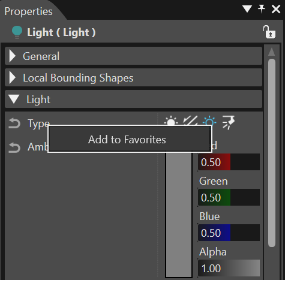
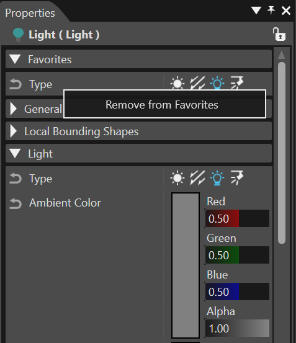
Any property can be saved as a favorite property just by right-clicking on it, after the favorites are enabled. A "Favorites" category will appear in the Properties, where you can see all the selected favorite properties.
Right click on a property in the "Favorites" category and select "Remove from Favorites" in the context menu to remove a single one.
#### Import favorities... / Export favorities...
Use "Export favorites..." in the "Environment - Property" section for saving all the selected favorite properties on a chosen location (as an .XML document). Any exported .XML favorites document could be imported by using the "Import favorites..." button from the "Environment - Properties panel" section.
#### Reset favorites
The "Reset favorites" button in the "Environment - Properties" panel section allows to reset all the available favorite properties.
#### Show Asset ID as hexadecimal
If enabled, Asset IDs (ID property in the Assets section of the Properties panel) are displayed in hexadecimal, if disabled they are displayed in decimal.
---
# Shortcut Customization
#### Shortcut Options
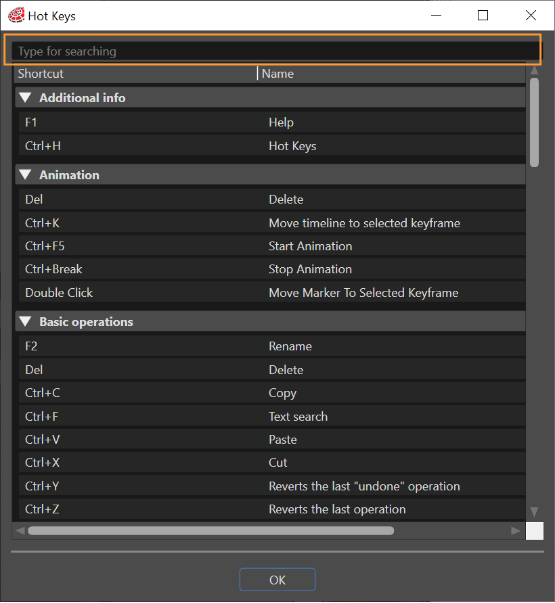
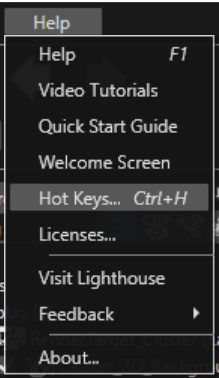
SceneComposer provides many default shortcuts available on a list that can be accessed from the "Help" > "Hot keys" menu or by using the shortcut Ctrl + H.
Due to the huge number of available hot-keys (shortcuts), it could be difficult to find a specific hot-key. In order to solve this issue, a search option is available in the upper side of the Hot Key panel ("Help" > "Hot Keys").
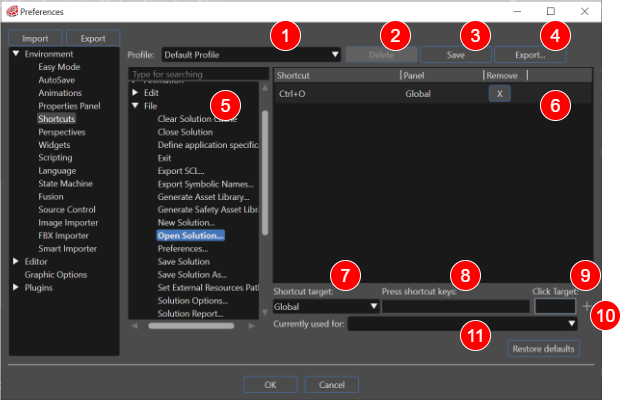
It is possible to create a different profile (i.e. "Hot keys" list) on which the user can set his/her own shortcuts. In the "Environment" section from the "Preferences", the "Shortcuts" panel allows the creation of new shortcuts.
Practically speaking, the user may create as many new profiles as are necessary, every of them with its own shortcuts. Every of these new profiles can be saved, exported (to make a list of all new shortcuts available), or deleted. If the user creates a new shortcut based on a default shortcut from the "Default Profile", the new shortcut has to be associated with a new profile - created by using "Save As" option.
It is not possible to create a shortcut by using the "Shift" + key or "Alt" + key.
#### Create Shortcuts
To create new shortcuts there are three major steps:
Select one of the operations for which you would like to create a new shortcut in the left panel.
Here you have two different possibilities:
- Remove the default shortcut by clicking "X" Button in column "Remove". Click in the "Press shortcut keys" field and press the new shortcut keys - a new shortcut is created.
- Create a new shortcut (without removing the default shortcut) by clicking in the "Press shortcut keys" field and pressing the new shortcut keys. In that case the new shortcut will appear under the default one.
| (1) | Profile | Applied Shortcut Profile |
| (2) | Delete | Delete the shortcut profile selected in (1) |
| (3) | Save | Save the shortcut profile selected in (1) |
| (4) | Export… | Export the shortcut profile selected in (1) |
| (5) | ー | Commands for which shortcuts can be assigned are listed. |
| (6) | ー | Displays the shortcut for the selected command selected in (5). |
| (7) | Shortcut target | Set the Panel on which the shortcut is available.
(If set to "Global," the shortcut will be available in all Panels.)
|
| (8) | Press shortcut keys | Click this field and press the shortcut key you want to add. |
| (9) | Click Target | If you want to add a mouse operation to a shortcut, perform the mouse operation in this field. The mouse operation performed will be displayed in (8). |
| (10) | ー | Add the shortcut displayed in (8) to the shortcut profile. |
| (11) | Currently used for | You will be notified if a shortcut added in (8) or (9) is being used by another command. |
After all the new shortcuts are created the "Save As" button may be used to create a new profile with a desired name or just press the "OK" button to save all newly created shortcuts in the "Custom" profile.
It is possible to use many shortcuts associated with the same operation in a specific profile. In this way, you have the opportunity to use different shortcuts for the same operation.
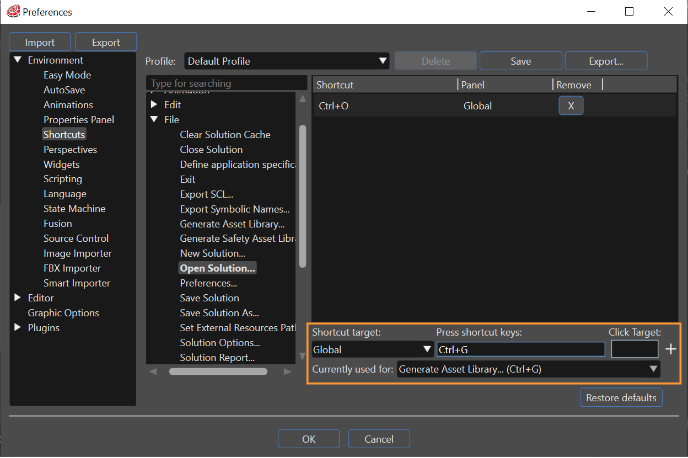
If the new selected shortcut is used for another operation, you will be notified in the field entitled "Currently used for".
If you would like to get back the default shortcuts, the "Restore defaults" button provides the possibility to get them back.
---
# Perspectives
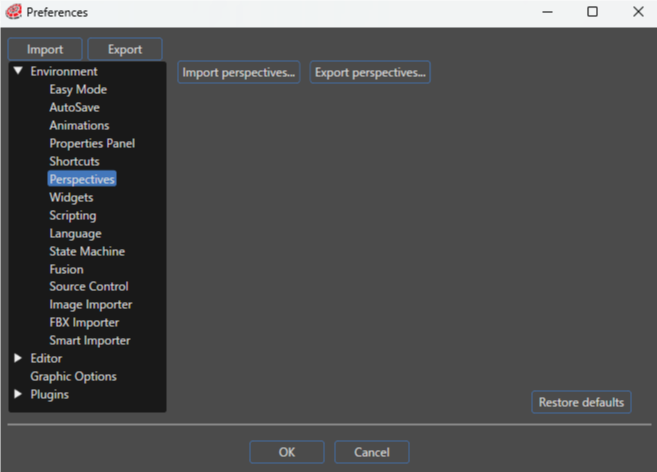
Any saved perspective (Display layout of each panel of Scene Composer) can be exported in order to use it any time when is necessary. This operation can be done via "Preferences" panel: "File" > "Preferences".
Here in the "Environment" section of the panel a "Perspective" section provides two buttons: "Import perspectives" and "Export perspectives". By using them the export/import operations can be performed.
---
# Widgets
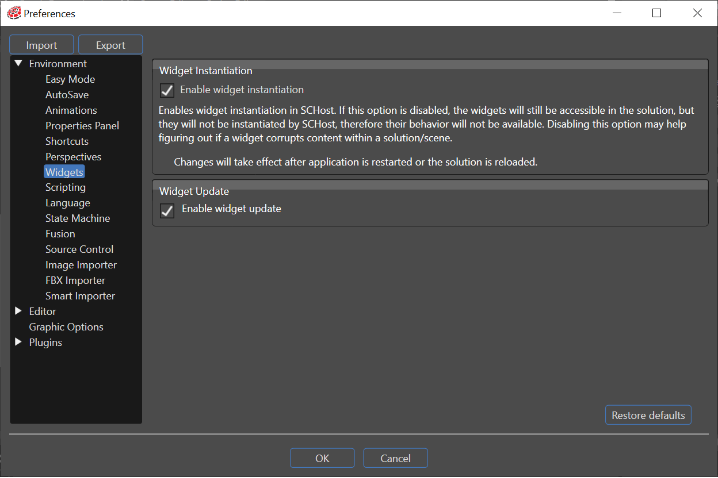
Two options for disabling widgets are available in the Preferences menu:
#### Enable widget instantiation
True by default. If this option is disabled, the widgets will still be accessible in the solution, but they will not be instantiated by SCHost, therefore their behaviour will not be available. Disabling this option will disable the following one and may help figuring out if a widget corrupts content within a solution/scene.
This option becomes available just after the application is restarted.
#### Enable widget update
True by default, indicates whether or not the widgets will be updated. By using the "Enable/Disable updating for all widgets in all scenes" button, the user can control whether the widgets from all scenes will be updated or just the ones from the current scene.
If this option is disabled, the Update() method of the widget will not be called by SCHost and also the "Enable/Disable updating for all widgets in all scenes" button from the toolbar will be disabled.
**See also:**
- - - [Update Widgets in all Scenes](https://doc3161en.candera.eu/link/200#bkmrk-update-widgets-in-al) in SceneComposer User Manual
---
# Scripting
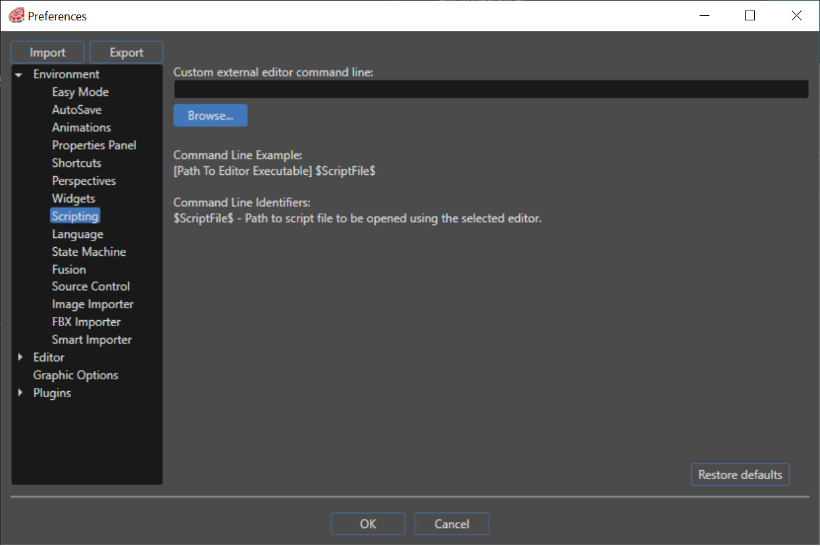
The user can edit scripts by using an external editor, too. The script code will be automatically updated and validated in SceneComposer after any modification in the external editor. Any error will be showed. To set up the path to the external editor a specific section is available in "Preferences" panel (see the image bellow).
Here the user can browse and select the external editor. As it is mentioned above, after the selection of the external editor any script that will be edited in it will be automatically updated and validated in SceneComposer.
---
# Language
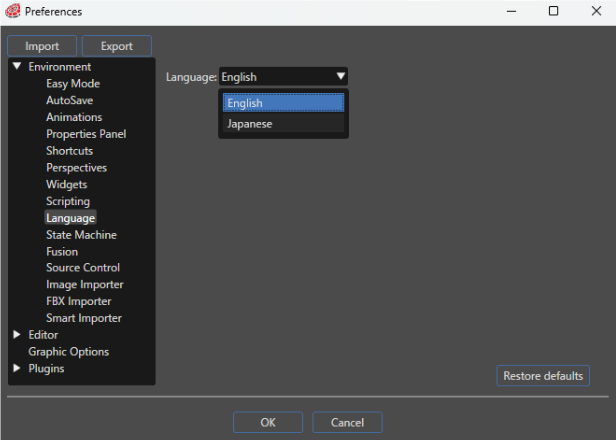
This option allows you to select **English** or **Japanese** as the display language. After choosing a language you must **manually restart Scene Composer** for the interface to switch to the selected language.
---
# AI Service
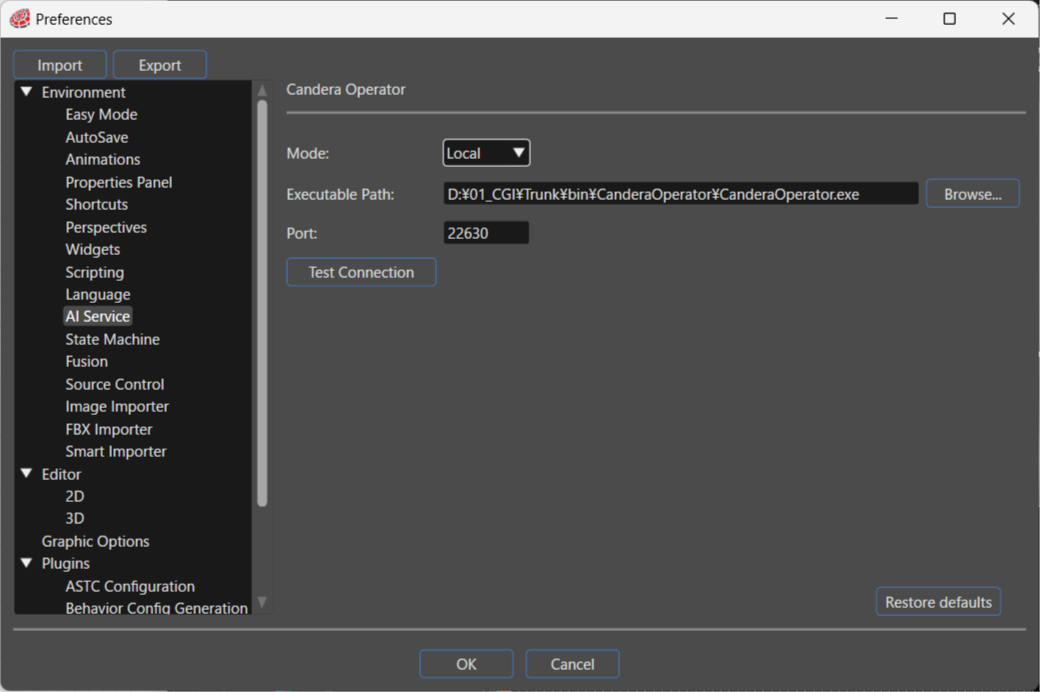
On this panel, you configure the connection that the AI features in Scene Composer use.
The features concerned are the **Docs Agent** panel and Search Helper. These features send questions and instructions to the AI service and receive answers. On **AI Service**, you configure how Scene Composer connects to **Candera Operator**, which relays that communication.
Every setting has a default value, and the features normally work with these defaults. You do not need to change them. Change a setting only when a connection problem occurs, or when you must specify the connection target explicitly.
#### Prerequisites
Candera Operator requires **.NET Runtime 10.0**. If CGI Studio was delivered with an installer, the installer also installs the runtime, and you do not have to do anything. If CGI Studio was delivered without an installer, install the runtime yourself before you use the AI features. If the runtime is missing, the requirements check dialog that appears when you start Scene Composer lists it as a missing item.
#### Settings
| **Setting** | **Description** |
|---|
| Mode | Selects how Scene Composer connects to Candera Operator, either **Local** or **Network**.
With **Local**, Scene Composer starts the Candera Operator process and connects to it. With **Network**, Scene Composer connects to a Candera Operator that already runs. Depending on your selection, the panel shows either **Executable Path** or **Host URL**. |
| Executable Path | Appears when **Mode** is set to **Local**.
Specifies the path to the Candera Operator executable. You can also select the file with **Browse...**.
|
| Host URL | Appears when **Mode** is set to **Network**.
Specifies the Candera Operator to connect to, as a `wss://` URL. You can specify only `localhost` or `127.0.0.1`.
|
| Port | Specifies the port number that Scene Composer uses to communicate with Candera Operator. A default port number is already set. |
| Test Connection | Tests whether Scene Composer can connect to Candera Operator with the current settings. The button becomes available after you change a setting, and a pop-up shows whether the connection succeeded. |
| Restore defaults | Click this button to restore the settings to their initial state. |
#### Choosing a Mode
##### Local
Scene Composer starts the Candera Operator process from the executable that you specify in **Executable Path**, and connects to it on the port number that you specify in **Port**. Use this mode under normal circumstances.
##### Network
Scene Composer connects to a Candera Operator that already runs. It connects to the host that you specify in **Host URL** and the port number that you specify in **Port**. In this mode, you do not specify an executable path, and Scene Composer does not start the Candera Operator process.
You can specify only `localhost` or `127.0.0.1` as the connection target. You cannot connect to a Candera Operator that runs on another machine on the network.
#### About Candera Operator
Candera Operator is a server that relays the communication between the AI features in Scene Composer and the AI backend. It runs as an application separate from Scene Composer.
AI features connect to Candera Operator first, and Candera Operator relays the communication to the AI backend. Because all AI features share the same relay point, they use a single authentication method and a single communication method. The authentication relies solely on the HASP key, and the product embeds no API key. Scene Composer sends only the identifier of the HASP key; it never sends the key itself. **Candera Operator itself does not require a HASP key, because the connecting Scene Composer provides it.**
**In Local mode, Scene Composer starts Candera Operator automatically.** It starts the process when you send the first question or instruction to an AI feature.
In **Local** mode, do not start Candera Operator manually. A manually started process conflicts with the process and the port that Scene Composer starts, and the connection fails. To use a Candera Operator that you started yourself, set **Mode** to **Network**.
#### Troubleshooting
| **Symptom** | **What to check** |
|---|
| **Test Connection** fails | Check that the path to the Candera Operator executable that you specify in **Executable Path** is correct. Also check that no other system uses the port number that you specify in **Port**. If the port number conflicts, change the value of **Port**. |
The panel of an AI feature shows Client could not connect! | Scene Composer cannot connect to Candera Operator. Check the settings on **Environment > AI Service**, and then test the connection with **Test Connection**. Also check that **.NET Runtime 10.0** is installed. |
# State Machine
In Preferences, \[ Enviroment \] > \[ State Machine \] allows you to configure settings related to the display of State Machine Editor.
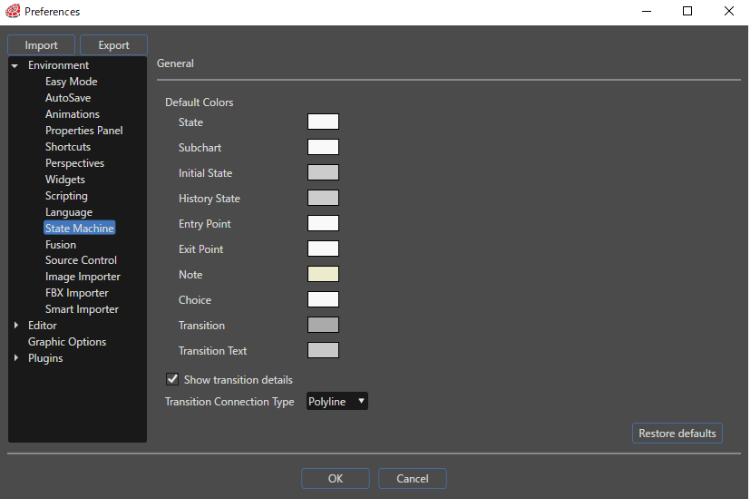
| Default Colors | Default colors can be set for States and Transitions displayed in State Machine Editor. Even if you change this setting, it does not apply to States and Transitions that have already been created.
|
| Show transition details | If this option is enabled, detailed information about the Transition (e.g., conditions under which the Transition occurs) will be displayed. |
| Transition Connection Type | This option allows you to set the line type (Polyline/Bezier/Spline) for Transition to be displayed. |
Your changed configurations will not be applied to **States** and **Transitions** that have already been created.
# Fusion
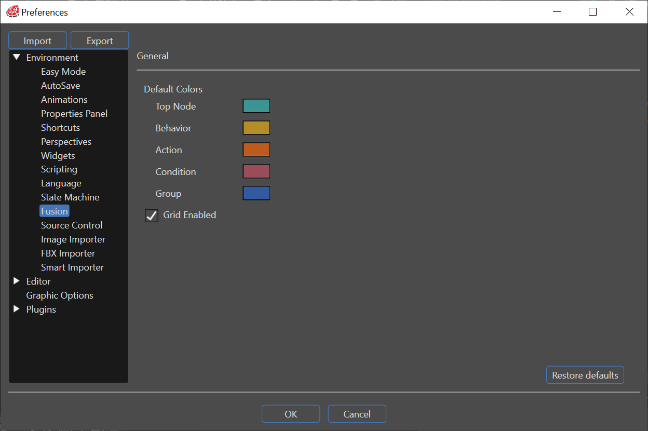
Open the Preferences dialog by selecting **File > Preferences...** from the menu bar. In the Preferences dialog, navigate to **Environment > Fusion** to configure settings that control how information is displayed within the Fusion panel.
#### General
| Default Colors | You can customize the color of newly created Fusion nodes displayed in the Fusion panel.
Changing the default color does **not** affect nodes that have already been created. However, the updated color will be applied to existing nodes in the Fusion diagram if the user selects "[Restore Default Header Color](https://doc3161en.candera.eu/link/1060#bkmrk-lock-performs-an-edi)" from the context menu.
|
| Grid Enabled | When this option is enabled, a grid is displayed in the [Fusion panel](https://doc3161en.candera.eu/books/fusion/page/fusion-editor-ui), providing visual guidance for aligning and positioning nodes. |
| Restore Defaults | Clicking the **Restore defaults** button resets all settings in this section to their original default values. |
# Configure Source Control
#### Configure Source Control
When working with a solution stored in a repository and using Scene Composer's built-in source control integration, you must configure an external comparison and merge tool.
To configure this, open the Preferences dialog (**File** > **Preferences** in the menu bar). In the **Source Control** section, specify the application to be used for merge and diff operations. You can also define the command-line parameters required for each operation (e.g. **Merge** and **Diff**).
Before performing any merge operations, ensure that the external merge tool is **enabled** by selecting the corresponding checkbox.
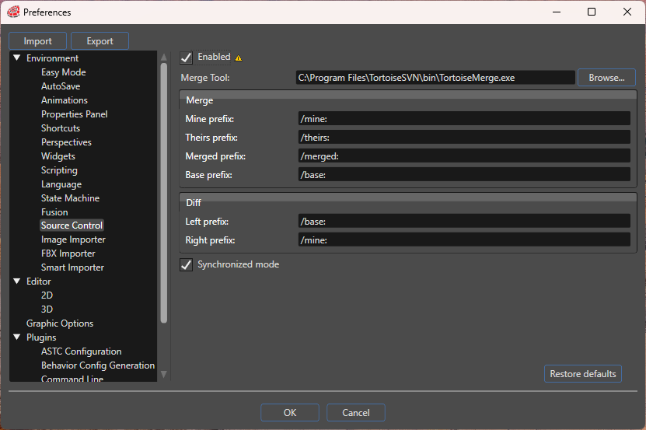
| Enabled | If enabled, the use of the configured merge tool is enabled. |
| Merge Tool | Configures the path to the external merge tool to use. |
| Merge | Specifies the commands for merge operations. |
| Diff | Specifies the commands for diff operations. |
| Synchronized mode | If enabled, Scene Composer automatically retrieves the solution status from the server. Because communication with the server can be time-consuming, you may choose to disable this option. In that case, you can manually update the status by selecting **Refresh status** from the source control context menu whenever needed. |
The value of the **Enabled** checkbox is evaluated only when a solution is opened or created.
---
# Configure Imported Bitmap Name Suffix
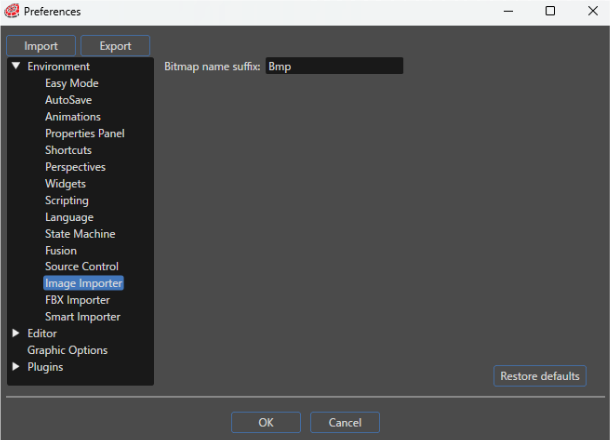
By using the "Image Importer" or the FBX Importer" option from "File > Preferences > Environment" it is possible to configure the Bitmap suffix used by the FBX importer and the Image importer. For this the desired suffix should be written inside the field "Bitmap name suffix". The default suffix ("Bmp") can be restored by using the button which is placed in the lower right corner of the panel.
#### Imported Bitmap Name Suffix
In order to avoid name conflicts when importing multiple items (for example importing a FBX may create a scene, an animation, a vertex buffer and a bitmap all with the same name) a suffix is appended to the name of the item. This suffix is Bmp for bitmap, VB for vertex buffer and for all other items is same as the type (Scene, Animation, etc).
---
# Configure the Smart Importer
#### Smart Importer
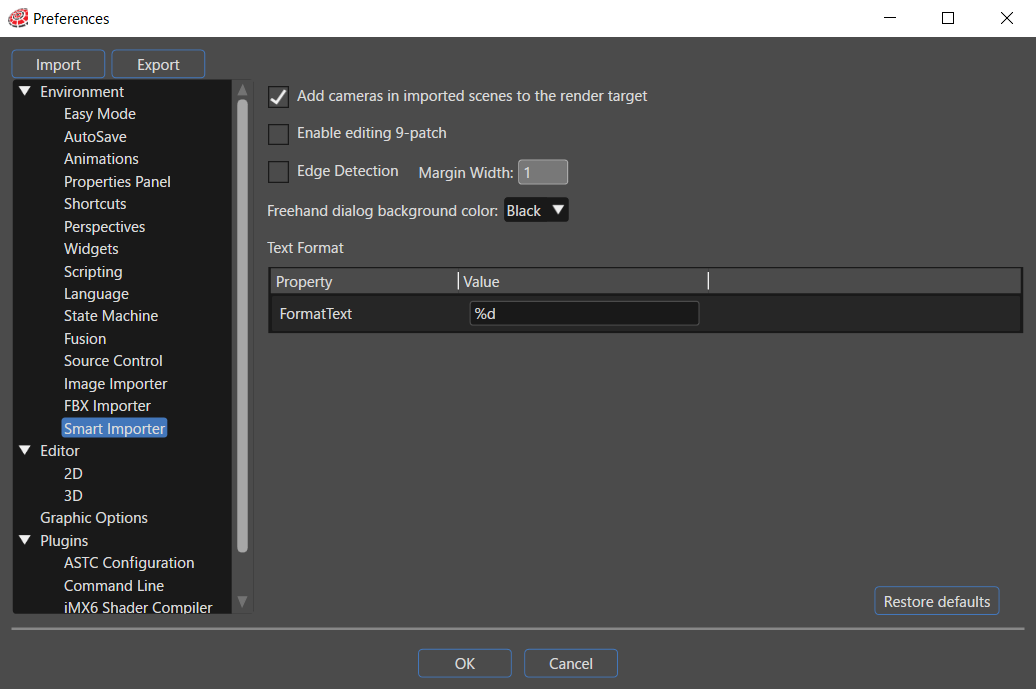
**Add Cameras in imported scenes to the render target**
Enable: Add a camera of an imported scene to a render target.
Disable: Not add a camera of an imported scene to a render target.
**Enable editing 9-patch**
Enable: You can set-up 9-patch on Smart Importer dialog.
Disable: You cannot set-up 9-patch on Smart Importer dialog.
**Edge Detection** When this option is enabled, in the Smart Importer dialog, enable Include Edges detection to make the appropriate controls detectable. The edge width is set in pixels.
**Freehand dialog background color**
When setting the pivot point in Freehand, the background color of the displayed dialog can be selected from black or gray.
**Text Format**
Set the default value of each property when importing with the Smart Importer.
---