
Manage Imports
Manage Imports
The Scene Composer Solution Explorer enables users to manage and organize all files associated with a solution. Imported resources can be arranged into folders based on user requirements, and this folder structure is linked to the directory structure stored locally on the system.
For additional details on managing solutions using folders, refer to here.
The folder organization of imported resources can be modified directly within the Solution Explorer panel. In addition, some imported assets may also appear in the Imports panel.
Original Image File Retention
When an image file is imported via the menu File > Import > Import Resources, Scene Composer retains both the original image file and the associated bitmap information file (*.bin), which is used internally by the application.
Original image files are not retained when importing formats such as FBX or glTF, nor when resources are imported using the Smart Importer.
Original Image File Name
The name of an imported image is constructed as follows:
- the image information name + the original image file extension
The name of the original image file is displayed in the Original Image section of the Properties panel for the imported resource.
If the resource file name is modified in the Solution Explorer, the corresponding original image file name is automatically updated as well.

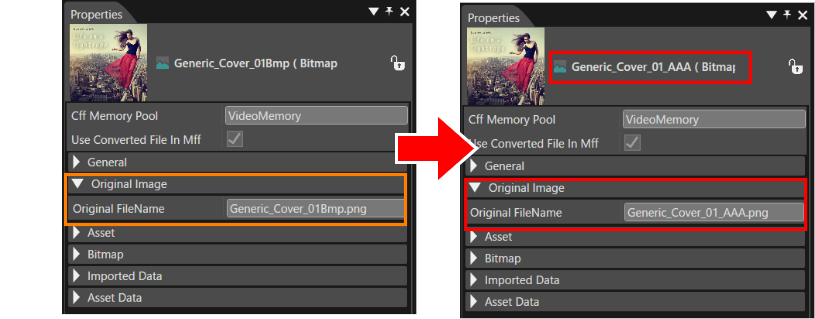
Original Image File Location
The Solution Explorer displays only the bitmap information file (*.bin), the original image file is retained in the local Solution folder. This folder mirrors the directory structure shown in the Solution Explorer.
Here is how to easily view the local file system location of a resource:
- In Solution Explorer, select the resource.
- Right-click the selected resource.
- The context menu is opened as shown in the figure below.

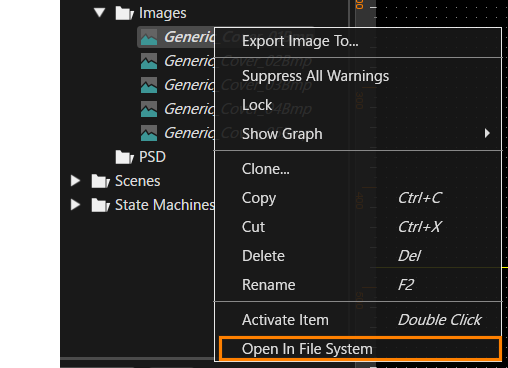
- The context menu is opened as shown in the figure below.
- In the context menu, select Open In File System.
- Windows Explorer is opened, displaying the folder that contains both the bitmap information files and their corresponding original image files (see figure below).

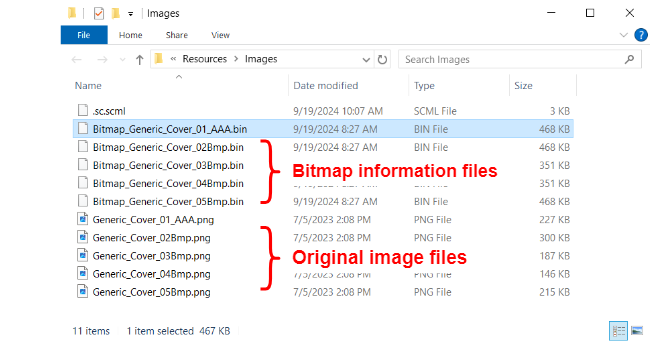
Moving Original Image Files
When an imported resource is moved from one folder to the other within the Solution Explorer, its original image file is moved together with the corresponding locally stored bitmap information file.
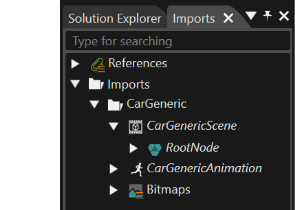
Imports Panel
The Imports panel can be showndisplayed or hidden byvia selectingthe menu option View > Libraries > Imports from the menu bar.. This panel displayspresents imported resources in a hierarchical structure. Resources listed in this panel can be added to the scene by- draggingeither and dropping them directly intoin the Scene Editor.Editor or the Scene Tree Panel - by using drag-and-drop operations.

Properties of Imported Resources
When an imported resource is selected in either the Solution Explorer or the Imports panel, its properties are displayedshown in the Properties panel. By default, this panel is located in the bottom lower-right area of the interface and provides detailed Information about the currently selected resource.

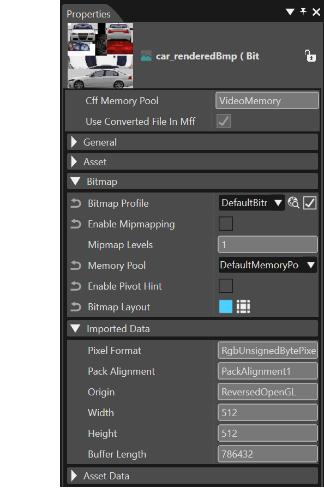
Clone, Delete and Rename Items
Imported resources can be cloned, renamed or deleted within the Solution Explorer panel. To perform these actions, right-click the desired imported item in the Solution Explorer and select the appropriate option from the context menu.
YouAdditionally, you can also right-click a folder that containscontaining imported files to performdelete bulkmultiple deletionresources ofat its contents.once.
For more information, refer tosee the Context Menu section of the Solution Explorer documentation.
Delete Unused Imports
If a solution contains unused imports or unused import parts,components, they can be removed to clean up the project by using the Delete Unused Imports... option.command. This command is available from the following locations:

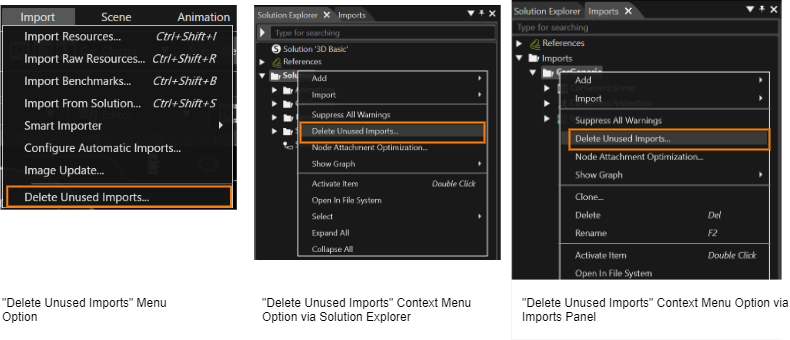
The Delete Unused Imports dialog displays a list of all imports containedincluded in the solution.solution, It allowsallowing you to review and remove any importsthose that are no longer referenced or required.
ItemsImports thatcurrently are in use within the solution - and therefore cannotnot beeligible deletedfor -deletion- are showndisplayed in a disabled (greyed out.out) state. You can toggle the visibility of these usednon-deletable (undeletable) importsitems using the Filter button located in the upper-right corner of the dialog.

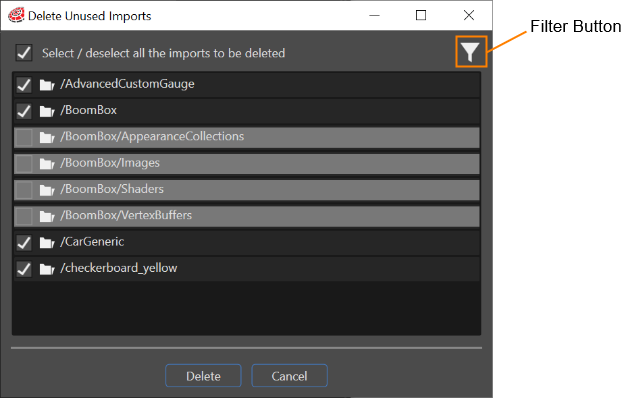
To delete unused imports, select the checkboxes next to the unused importsitems you want to remove,remove thenand click Delete.
Import items that can be identified and deletedremoved as unused imports include:
- Images
- Raw resources
- Fonts
- Fragment shaders
- Vertex shaders
- 3D model files
- Scripts
If an import folder contains additional foldersfiles or filesfolders that are not part of the imported resources, the folder itself willis not be deleted. Only the unused imported files within that folder are removed.
Export Imported Images
If needed, importedImported images can be exported from the solution as .png file.files. This option is available from thein the context menu when right-clicking an imported image. The export operation also supports multiple selection, allowing you to export severalmultiple image resources to be exported at once.
An imported image can be exported even if it is in a locked .state.
- Solution Explorer
- Imports panel
- Canvas Node
- Canvas sprite
- Billboard
To export an imported image as a .png file:
- Select the imported image you want to export.
- Right-click on the selected image.
- The context menu is opened (see figure below).

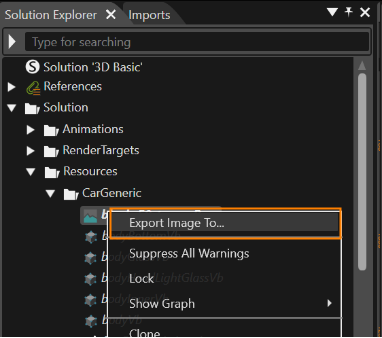
- The context menu is opened (see figure below).
- In the context
menumenu,chooseselect Export Image To...- The Windows Save As dialog appears.
SelectChoose a destination folder andenterspecify a file name, then click Save.- The image is exported and saved in .png format.
-
Currently, the export operation outputs the original image file
isratherexported - notthan the processed asset version.
Edit an Imported Script Resource
Scripts can be imported via the menu using Import > Import Resources... ImportedBy default, imported script files are initially read-only,; buthowever, they can be converted to an editable format if changesmodifications are required.
To make an imported scripts editable:
- In the Solution
Explorer,Explorer, select the script resource. - Right-click the script and choose Change to Editable from the context menu.

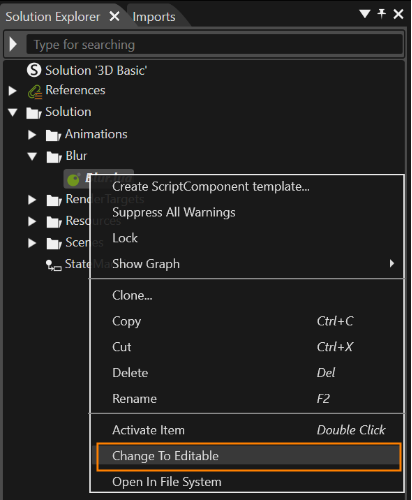
For instructions on how to workworking with script resources, please refer to the Scripting documentation.