Skinning
Since CGI 3.14, skinning animationsyou can be played by importingimport skinning FBXFilmbox (FBX) or glTFGL Transmission Format (glTF) files. Scene Composer can then play the skinning animations. However, the following limitations exist.exist:
- The maximum number of joints associated with each vertex is 4.
- If the number of joints associated with a
skinning meshSkinningMesh is 100 or less, Scene Composer performs skinningis performedusing a shader. - If the number of joints associated with the
skinning meshSkinningMesh is between 101toanda255maximum(maximum),ofScene255,Composer performs skinning processingwill be performedon theCPU,CPU.butIn this case, the performancewill decrease.decreases. - CGI Studio manages
rotationrotations usingEuler,Euler angles, soitreproducingmaythe animation might not bepossible to reproduce the animation.
possible. - If a SkinningMesh and the SkinningMesh's parent Transform are not identity matrices and the
SkinningMesh's postureSkinningMesh does notgiveappeartheasexpected result, pleaseexpected, set the identity matrix for SkinningMesh and the SkinningMesh's parent Transform. - If you place a SkinningMesh and Joint Nodes
are placedunder a Group, CGI Studio applies the changesmadein the Group's Transformwill be appliedto the SkinningMesh twice.
In addition to the above, please note the following limitations when importing skinning in FBX file format.
- CGI Studio does not support FBX format FbxSkin::eDualQuaternion and FbxSkin::
eBlend are not supported.eBlend. - CGI Studio does not support FbxCluster::eAdditive in FBX
format is not supported.format.
SkinningMesh
Note that you can create a SkinningMesh that you can beuse used onin Scene Composer by importing an FBX/FBX or glTF file that contains at least one skinning.skinned Themesh. properties of aA SkinningMesh createdthat you create by importing isa asfile follows.has the following properties:
Skin (Common Properties)

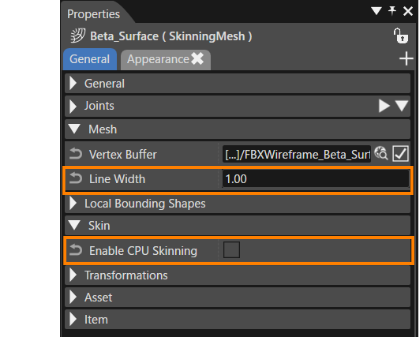
| Line Width |
|
| Enable CPU Skinning |
|
Other ProperiesProperty items
TheCGI Studio sets the following propertyproperties itemsduring import, that are setnot at importing and cannot be changed.editable:

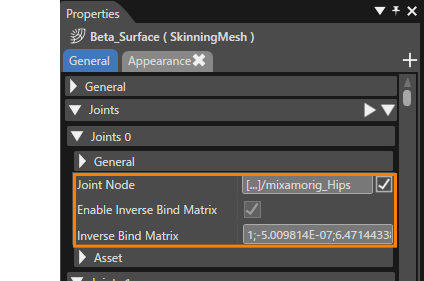
| Joint Node | |
| Enable Inverse Bind Matrix |
If the property is enabled, If the property is disabled, |
| Inverse Bind Matrix |
Adding importedImported scenesScenes
Import of FBX or glTF files,files includingthat skinning,include isskinning performedby using the standard procedure (FBX import procedure, glTF import procedure). After importing, creatingcreate new scenes and animations from the scenes and animations contained in the imported resources.
- Select a scene contained in the imported resource and
chooseselect[Add Scene From Template...]from the context menu.- The
[Add New Scene 3D]dialogwill appear.appears. - For more information on
[Add Scene From Template...]feature, seehereAdd Scene From Template.
- The
MakeConfigure the necessary settings on the[Add New Scene 3D]dialog andpressclick[OK] button..TheScene Composer adds the scenewill be addedas a new scene in the Solution Explorerpanel,panel, in the Solution > Scenes folder.- The
sceneScenetreeTree panelwill displaydisplays the added scene.

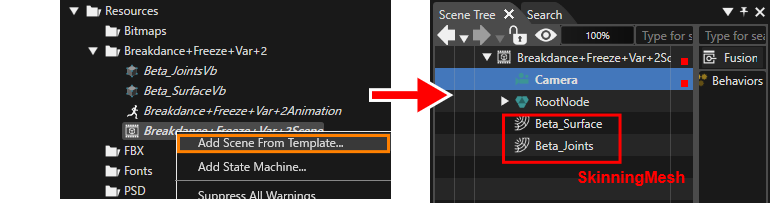
CGI Studio adds the SkinningMesh is added to the imported scene (red frame in the right figure above).
If the imported scene does not contain any camera or light nodes, add them to the new scene from the Node 3D item in the Toolbox panel and makeconfigure the necessaryrequired settings.
Add a Render Target
AddsAdd the camera of the addedimported scene to the render target.
When a camera node is added
DisplaysDisplay the Render Targets panel.
AScene Composer has already added a camera with the added scene namehas already been addedin the panel.
CheckSelect the checkboxes for the added cameras.
If the imported scene contains a camera
- In the Render Targets panel,
selectright click on the Render Target andthenselect[Add Camera to Render Target...]from the context menu.
- The
[Choose Item]dialogwill appear.appears.
- The
- Expand the Scenes folder in the
[Choose Item]dialog and select the cameras in the scene youadded.
Add importedImported animationsAnimations
To play the skinning animation in the Player, add the animation infrom the imported resource.
SelectRight-click an animation contained in the imported resource andchooseselect[Add Animation From Template...]from the context menu.- The
[Add New Animations]dialogwill appear.appears. - For more information on
[Add Animation From Template...]feature, seehereCreate animation from template.
- The
MakeConfigure thenecessaryrequired settingsonin the[Add New Animations]dialog andpressclick[OK] button..TheYouscenecanwill be added as a new scenesee in the SolutionExplorerExplorer,panel,thatinScenetheComposerSolution>Animationscreatedfolder.a new animation.
Play skinningSkinning animationAnimation
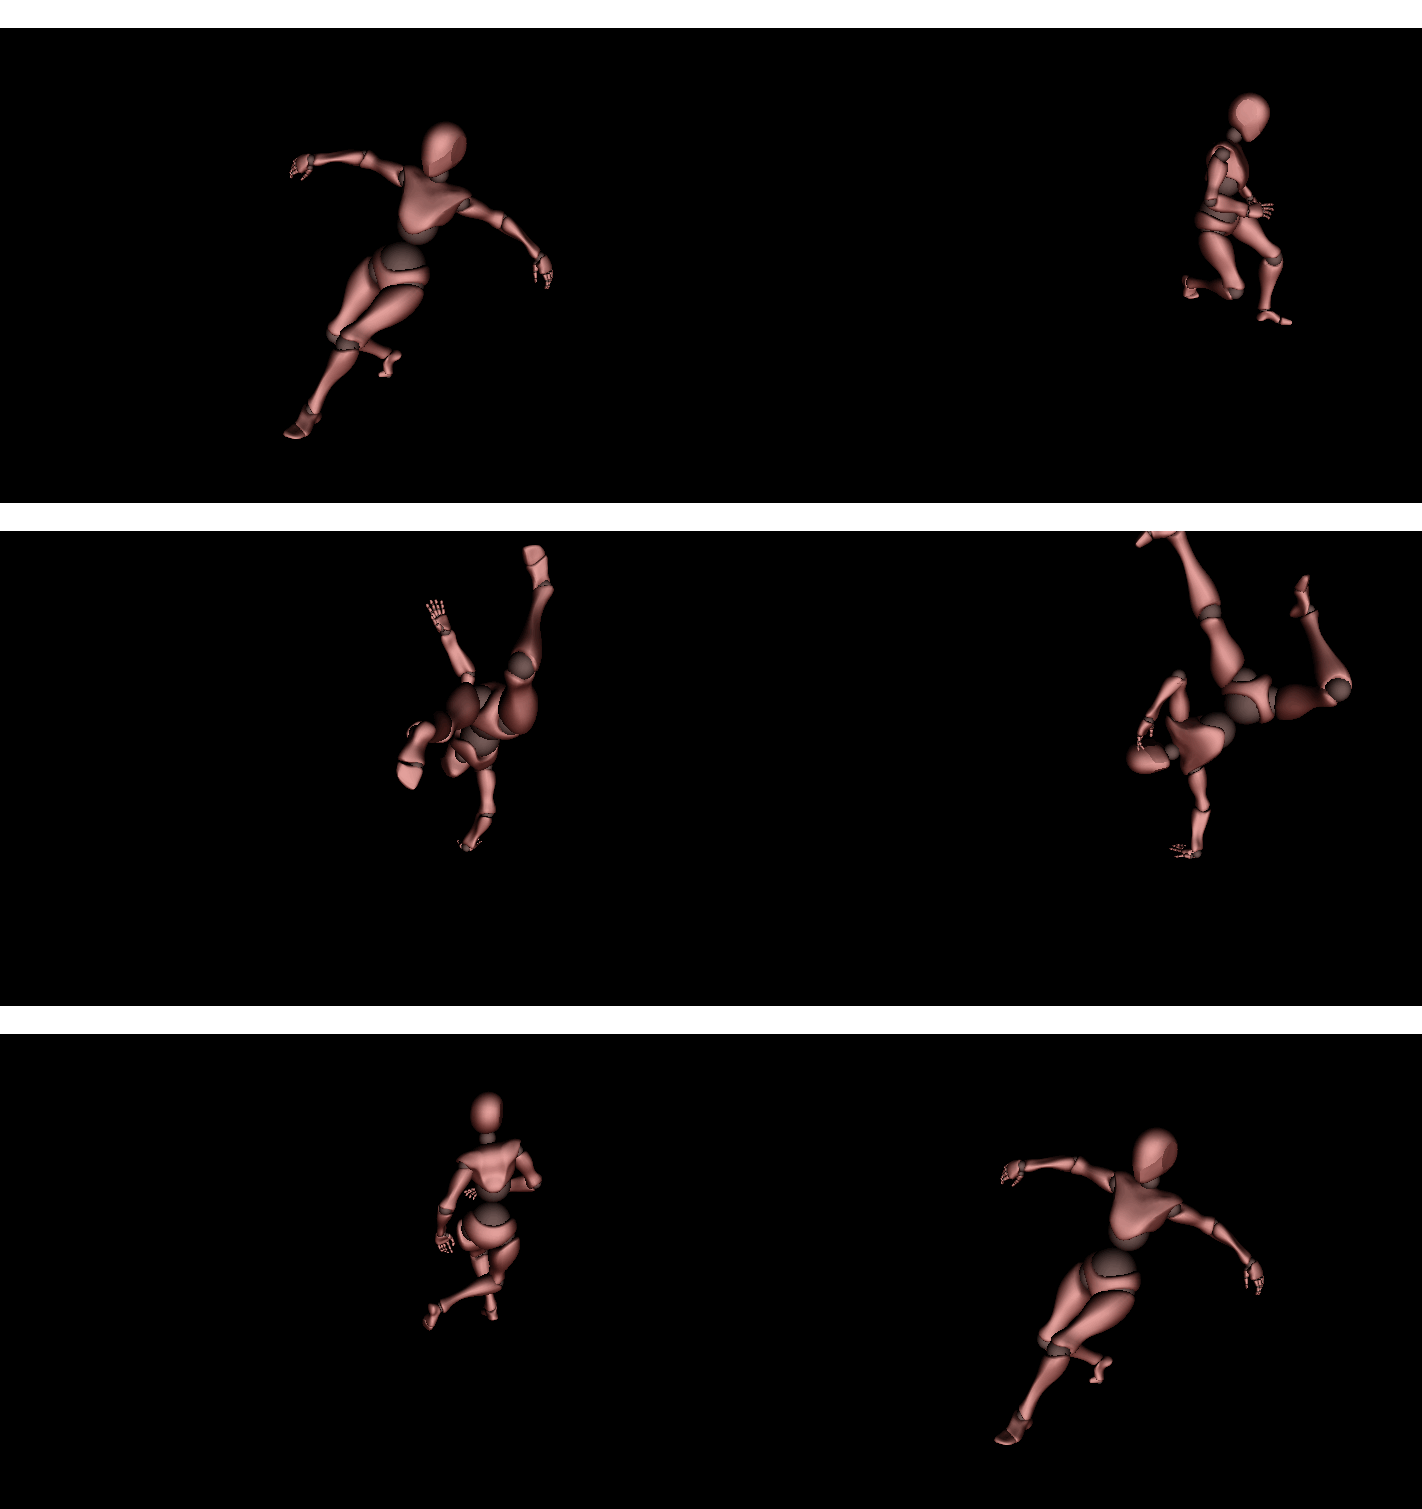
Use CGI Player is used to play back skinning animations in a composed scene.
PressClickthe [Play selected scenario...] iconon the toolbar to launch the CGI Player.
- If
youyourhavesolutionnotcontainssavedunsaved changes, Scene Composer opens thesolution before this operation, the [Save Solution]dialogwill appear andasking youwilltobesaveaskedthe solution. Click OK in the dialog to save the solution. ByScenepressingComposerthe [ OK ] button in the dialog,generates the asset filewill be automatically generatedandopenedopens it in CGI Player.
- If
- In the CGI
Panel,Panel, check the target scene from the scene list on the left side.

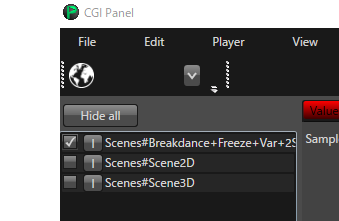
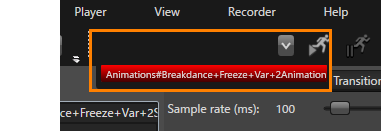
SelectUse theanimation to be played from the toolbarpull-downmenu.
menu to select the animation, that you want the CGI Player to play.
PressClickthePlaybuttonAnimationonin the toolbar toexecuteplay theanimation playback.
animation.TheCGI Player starts to play the skinning animation specified in thedisplay panel is played.Panel.