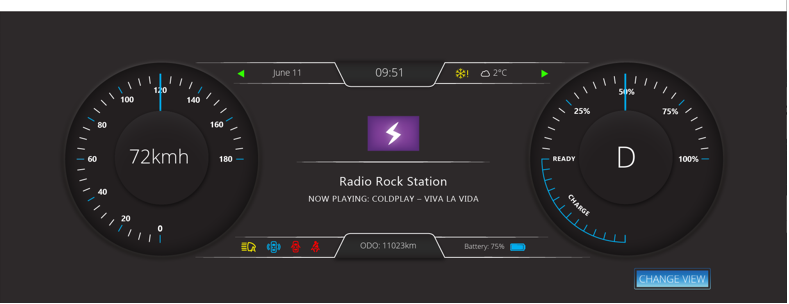
Adobe XD Importing
Description
This section explains about Adobe XD file format, its layer structure, naming conventions, and an import example that uses a sample file.
Layer Structure and Naming Guideline
As with Photoshop Document (PSD) file format, the SmartImporter's AI analyzes imported files to detect, propose, and create Controls for the solution. Keep the Adobe XD layer format close to the standard Controls in Scene Composer. The naming guideline is as same as the PSD guideline. For details, refer to the Recommended Layers Structure for Smart Importer.
Additional naming conventions exist for efficiently importing AdobeXD files, such as the following.
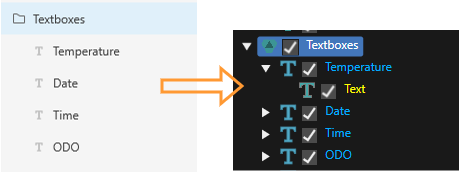
Control: Text
The Smart Importer creates Text Control for each text layer.
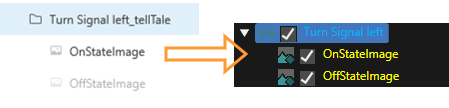
Control: Tell Tale
The Smart Importer creates a Tell Tale Control when the group name has the _telltale suffix and contains a child image layer.
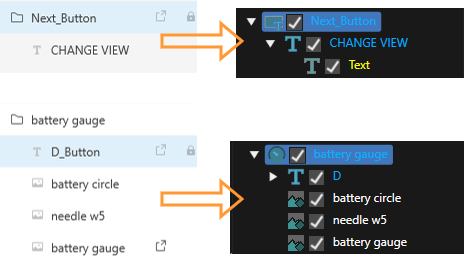
Control: TextButton
The Smart Importer creates a TextButton Control when the layer meets either of the following conditions:
- the group layer contains a child text layer
- the text layer name has a
_Buttonsuffix.
-
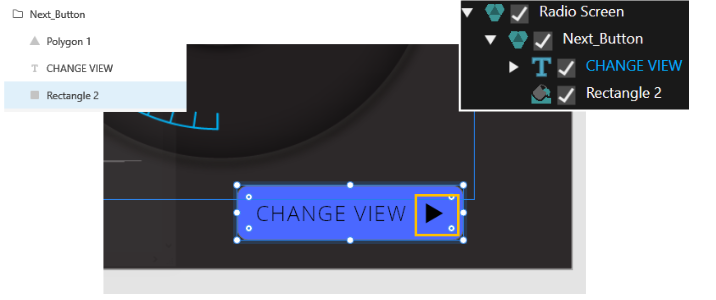
Smart Importer supports only rectangle shapes; it does not support other shapes, such as polygons.
AdobeXD Features Supported by CGI Studio Smart Importer
The Smart Importer supports importing the following Adobe XD features:
- Artboards
- Components
- Texts
- Text
- Font
- FontStyle
- FontSize
- FillColor
- Position
- Size
- Images
- Position
- Size
- Solid Rectangles
- Color
- Position
- Size
- Buttons
- Text
- Transitions
- TellTales
Artboards
The Smart Importer converts each AdobeXD Artboard into a Scene in SceneComposer.
Components
Adobe XD has a component system where you can define components once and instantiate them multiple times. If an artboard references a component, the Adobe XD converter looks up and instantiates components as needed.
Texts
The Smart Importer converts Adobe XD text areas into Text Nodes in SceneComposer.
It reads the configuration of the Adobe XD text and applies the following properties to the SceneComposer Text Node:
| Property | Description | Example |
| Text | the text to display | |
| Font | the font's PostScript name | OpenSans-Light |
| FontStyle | the font's style | Light |
| FontSize | the font's point size | 72 |
| FillColor | a fill color (if the Adobe XD file configures a solid-style) |
|
| Position | the position of the text area in the scene | |
| Size | the size of the text area (see note below) |
-
If the AdobeXD file defines a text area with
Auto WidthandAuto Height, the Smart Importer cannot calculate the text area bounding box.
See section Text Controls in the Adobe XD import example.
Images
The Smart Importer converts Adobe XD shapes ("type": "shape") with a pattern fill (a fill of "type": "solid") to RenderNodes.
It applies the following properties to the SceneComposer RenderNode:
- Position
- Size
Solid Rectangles
The Smart Importer converts rectangles (shapes of "type": "rect") with a solid fill (a fill of "type": "solid") to SolidColorNodes.
It applies the following properties to the SceneComposer SolidColorNode:
- Color
- Position
- Size
See section Rectangle in the Adobe XD import example.
Buttons
If the Adobe XD resource contains a group whose name ends with _Button, the Smart Importer creates a TextButton.
-
The Smart Importer checks the suffix in a case insensitive way, so
_buttonor_BUTTON, and similar also work.
The Smart Importer applies the following properties to the SceneComposer TextButton:
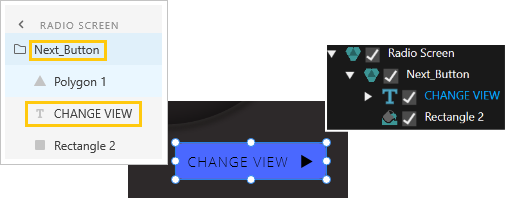
- Text - The Smart Importer uses the first text label inside the Adobe XD group as the TextButton's Text.
-
The button depicted above provokes a Scene transition. The Smart Importer takes this transition from the first artboard transition inside the group. See Transitions.
Transitions
Adobe XD supports building interactive prototypes with several kinds of transitions. A button can trigger a navigation transition to a different artboard, and a component can support transitions between different states. SceneComposer supports button-triggered Scene transitions that Scene Composer generates from artboard transitions in the XD file.
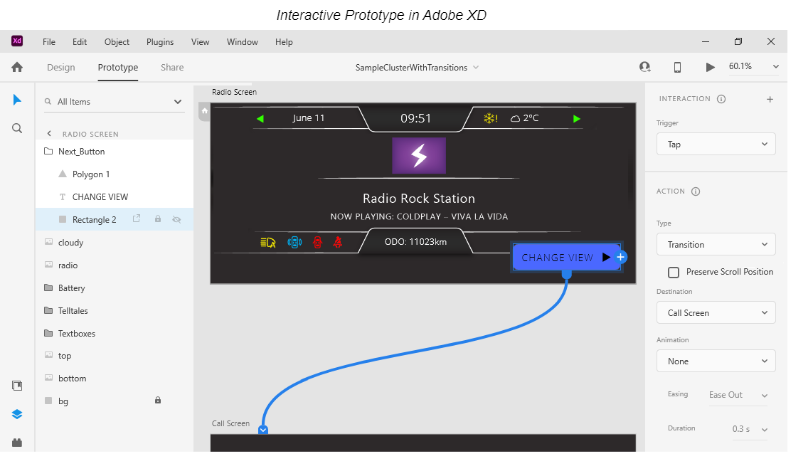
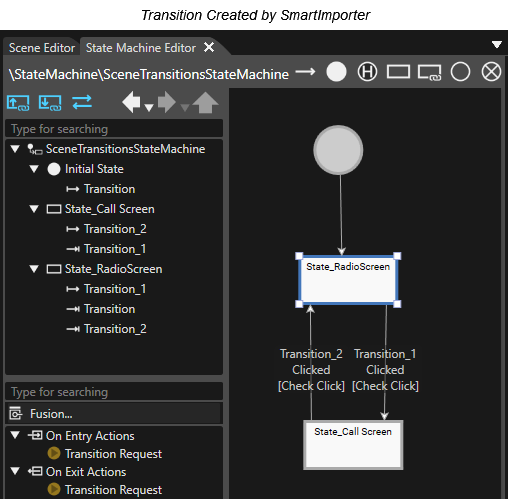
See Transition in the Adobe XD import example.
Tell Tales
The Smart Importer creates a Tell Tale Control for an Adobe XD group whose name ends with _TellTale.
- If the group contains an image with
OnStatein its name, the Smart Importer sets it as the Tell Tale Control's On State Image. - If the group contains an image with
OffStatein its name, the Smart Importer sets it as the Tell Tale Control's Off State Image.
-
The Smart Importer checks the group name's suffix and the image names in a case insensitive way, so
_Telltaleor_telltale,ONSTATE_pic,image_offstate_pictureand similar variants also work.
See Tell Tale Control in the Adobe XD import example.
Adobe XD import example
This sample explains the layer structure and restrictions for Adobe XD.
Get the sample Adobe XD file from the following location:
"...\cgi_studio_content\2D\XD\XD_SampleCluster.xd"
Rectangle
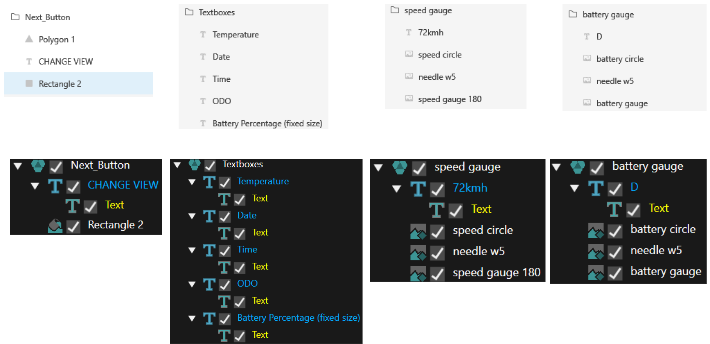
The Smart Importer supports only rectangle shapes for import, therefore it does not import the polygon in the "Next_Button" group as depicted below.
Text Controls
The Smart Importer sets a text layer as a Text Control, as it does for other file formats. In this sample, the following layers are text layers:
- Change view under "Next_Button"
- All child layers under "Textboxes".
- The 72kmh label under "Speed gauge"
- D under "Battery gauge"
Tell Tale Control
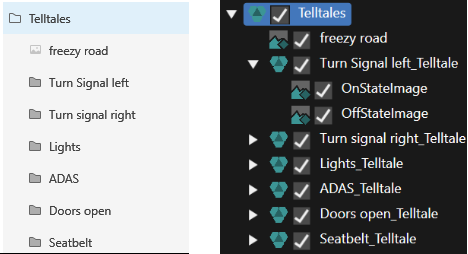
Because the sample file contains a "TellTale" group whose name has the _telltale suffix, the Smart Importer sets its child image layers as Tell Tale Control.
Transition
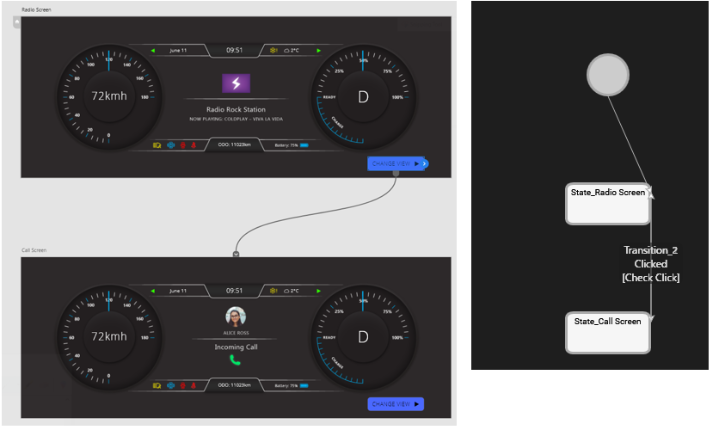
The Smart Importer transfers the transition setting that is included in the Adobe XD file to State Machine Editor.
Other options
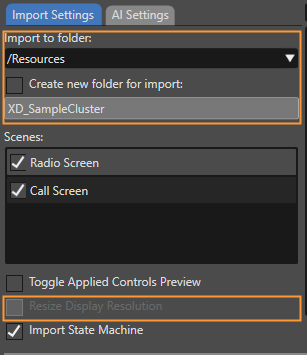
If necessary, change the Import to folder setting and its related options. Check Resize Display Resolution if needed.
Check the Import Result in the Player
- After configuring these settings, click OK in the Smart Importer dialog to proceed with the import.
- Click Play with Generate and Play selected.
- When the Player application starts, clear "Scenes#Scene2D" to view the import result.
- Click Change view in the lower-right corner to transition to the other scene according to the transition defined in Adobe XD.